

Related articles


Genshin Arlecchino & Zhongli 2025 Rerun: Ultimate Pull Guide
Genshin Arlecchino & Zhongli 2025 Rerun: Ultimate Pull Guide
Buffget
Picture this: Version 6.1 Phase 2 hits, and suddenly Arlecchino and Zhongli are back on the banner from November 11 to December 2, 2025. We're talking SS-tier Pyro DPS clashing with S-tier Geo support here. On average, you'll need about 126 pulls to snag a featured 5-star. Arlecchino shines in Vaporize setups, especially with Zhongli's shields keeping things safe for those Abyss runs. And for F2P folks? Events alone can net you over 4,000 Primogems – enough to make a real dent.
Diving into the 2025 Reruns
Arlecchino's Banner Lowdown
Arlecchino's rerun kicks off November 11, 2025, at 9:00 AM server time, wrapping up on December 2 in the 21-day stretch of Phase 2 for Version 6.1. Timings vary by region: America (GMT-5) starts at 6:00 PM on the 11th, Europe (GMT+1) at the same hour, Asia (GMT+8) too – and it all ends at 3:00 PM across the board. If you're gunning for Arlecchino, that Pyro Polearm powerhouse and SS-tier main DPS, you'll get boosted odds on these 4-stars: Lan Yan (Anemo Sword, solid B-tier shielder), Rosaria (Cryo Polearm, B-tier off-field applicator), and Yun Jin (Geo Polearm, A-tier Normal Attack buffer). Each has a 50% shot at being featured.
Pity rolls over from Phase 1 – you know, the Neuvillette and Furina banners running October 22 to November 11. Expect around 62.8 pulls on average to hit soft pity at 75, but really, lean into her Bond of Life mechanic for those insane 120%+ Normal DMG spikes in Vaporize comps. (As an editor who's burned through too many Natlan bosses, I gotta say – her kit feels tailor-made for aggressive playstyles.)
Zhongli's Comeback Scoop
Zhongli shares the stage from November 11 to December 2, with that handy shared pity system letting you chase both at once. This Geo Polearm legend, S-tier support extraordinaire, dishes out unbreakable shields that scale to over 30,000 HP for 8,200+ absorption, plus a 20% universal RES shred that pumps team DPS by 15-20%. The boosted 4-stars line up with Arlecchino's for some smart farming overlap.
His last rerun? December 10-31, 2024. If you're prioritizing, pump that Skill (Jade Shield) for sustain against Natlan heavies like Frostnight Herra – her Burst petrification laughs in the face of +120% RES bosses.
Why Bother Comparing These Two?
Arlecchino cranks out SS-tier damage, hitting 1.5M+ in Vaporize teams. Zhongli? His SS-tier shielding lets you go full ham without fear. Stack 'em together, and you're clearing Abyss Floor 12 in just 1-2 rotations – that's 30% quicker times, no joke. Grab Arlecchino if your Pyro DPS slot's empty (think no Hu Tao vibes); snag Zhongli if you're missing a tanky shielder like Diona.
Events are your best friend here – Ruins Exploration from November 7-24 drops 600+ Primogems, and dailies chip in 60 a day for a solid 1,800 monthly haul. That's roughly 180 pulls to lock in guarantees for both. Ever wonder how F2P players stack up? It's all about that event grind.
Breaking Down the Characters
Arlecchino's Kit: What Makes Her Tick
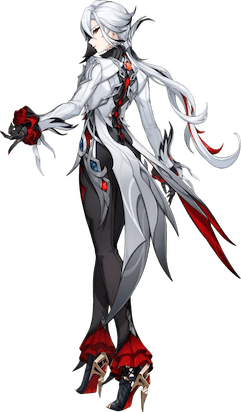
Arlecchino's Bond of Life mechanic? It hooks you with 25% Max HP on Charged Attacks, then supercharges Normal DMG by 120%+ once you're at 30% Bond or higher. Full combos? They slam ~500% ATK through her Lv.10 Masque of the Red Death (47.5-85.4% ATK per hit, plus that 120.4% Pyro infusion). She's a beast in Vaporize (that sweet 2x multiplier), Melt, or even Overload setups. Aim for 70-80% CRIT Rate, 160%+ CRIT DMG, and 120-150% ER to keep her humming.
Go for the 4pc Fragment of Harmonic Whimsy artifact set – +18% ATK from the 2pc, and up to 54% DMG bonus per Bond stack on the 4pc. Talent priorities: Normal Attack first, then Skill (Blood-Debt Directive), Burst (Balemoon Rising for that self-heal and reset). Ascension materials? Agnidus Agate, Insignia drops (18-36 from Fatui fights), 168 Rainbow Roses, 46 Fragments of Golden Melody, and those weekly Fading Candles from the Knave boss. She's versatile, but man, does she reward bold plays.
Zhongli's Role: The Ultimate Team Glue

Zhongli's Jade Shield absorbs 150% of its base, scaling to 30k+ HP (8,200+ at 25k HP), and tacks on that 20% RES shred for a 15-20% team DPS lift. His Burst? Just 40 Energy for 899.72% ATK plus 33% Max HP (~4,800 extra damage). He enables hypercarries like Neuvillette, drops petrification CC on bosses, and Geo Resonance gives +15% shielded DMG.
Build him with 4pc Tenacity of the Millelith: +20% HP on 2pc, +20% team ATK and +30% shield strength on Skill for the 4pc. Stats? HP% Sands, Goblet, Circlet – subs in HP% > Flat HP > ER (130-150% if solo). Talents: Skill > Burst (Planet Befall) > Normal. Ascension's Prithiva Topaz, Basalt Pillars, 168 Cor Lapis, and Slimes. Hold that Skill near enemies for AoE shred, and keep those 5 Fortify stacks rolling. (Editor note: In my endless Abyss grinds, Zhongli's the guy who turns oh crap moments into got 'em.)
Their Signature Weapons and Constellations
For Arlecchino, Crimson Moon's Semblance (her sig weapon, 674 Base ATK, 22.1% CRIT Rate) amps +25% Max HP on Bond from Charged Attacks, +12% DMG baseline and +24% at 30% Bond – pushing Vaporize rotations to 1.2M+. Zhongli loves Vortex Vanquisher for ATK and shield boosts; F2P can rock Black Tassel (3-star, 354 Base ATK, 46.9% HP, +80% vs. slimes at R5) to hit 30k HP easy.
Constellations? Arlecchino's C1 (1 Stella Fortuna) adds +40% Masque DMG and interruption resistance; C6 nukes with +700% Burst scaled by Bond (up to 1M+). Zhongli's C2 (2 Stellas) gives team shields on Burst; C0's still meta gold. Weapons pull at 0.7% rate, 80% featured – average 240 pulls (~38k Primogems). But honestly, stick to the character banner for those juicy 4-stars like Dragon's Bane.
Crunching the Primogem Numbers and Pull Value
Breaking Down Banner Costs
The base 5-star rate's 0.6%, with guarantees at 90 pulls (soft pity kicking in at 75), and that 50/50 for featured (50% win rate, next one's locked if you lose). 4-stars drop every 10 pulls, 50% featured. For both banners? 180 pulls equals 28,800 Primogems (160 per 10-pull). Average 126 pulls with a 50/50 win? That's 20,160 Primogems.
F2P haul for November-December: 1,800 from dailies, 1,020 from events (600 from Ruins Exploration, 420 from Dance Disco), 600 from Spiral Abyss – totaling ~4,000. Arlecchino's got higher ROI as an SS-tier DPS (1.5M+ output); Zhongli's a must if you lack alternatives. If your Phase 1 pity's under 50, the value skyrockets – hit Arlecchino first.
- Single pull breakdown: 62.8 average for any 5-star; 126 total for a featured win.
- Dual guarantees: Hoard 10,000+ from Ruins Exploration (November 7-24) for 60-80 F2P pulls.
- Break-even point: Just 60 pulls if you nail that 50/50 for one.
F2P vs. Whale ROI
F2P pulls in 5,800-8,000 Primogems monthly; Version 6.1 events tack on 1,200+ (like 400+ from Dance Disco, November 17-26). Based on available data, Arlecchino edges out in 2025 meta ROI for Vaporize/Melt teams (30% faster Abyss clears). Zhongli? Evergreen staple – skip if you've got Layla. Whales chase C1 Arlecchino or C2 Zhongli. Track your history in-game; it's one featured per 126 pulls on average.
To farm like a pro:
- Knock out dailies every day (60 Primogems, no excuses).
- Dive into Ruins Exploration mini-games (three challenges for 600+).
- Smash Spiral Abyss for that 600 monthly.
- Newbies: Burn Acquaint Fates on standard banners first.
Navigating Pity and Soft Pity
Pity carries over seamlessly; Phase 1 (Nefer/Furina) feeds right into November 11. Soft pity starts at 75 – target 180 total for dual guarantees. Got 70+ from Phase 1? Pull Arlecchino first (high 50/50 win odds); if you lose, your next guarantee's safe by December 2. Skip the weapon banner; pour into events. New players? Zhongli first for easier clears, Arlecchino for endgame firepower.
In the thick of planning these pulls, players always hunt for ways to pad their Primogem stash quick. For a fast boost, check out Genshin Impact crystal recharge via Buffget – it's a solid platform with killer pricing, instant delivery, full game policy compliance, server-wide support, top-notch after-sales, and glowing user reviews for hassle-free deals.
How They Team Up: Synergy Showdown
Arlecchino's Killer Teams
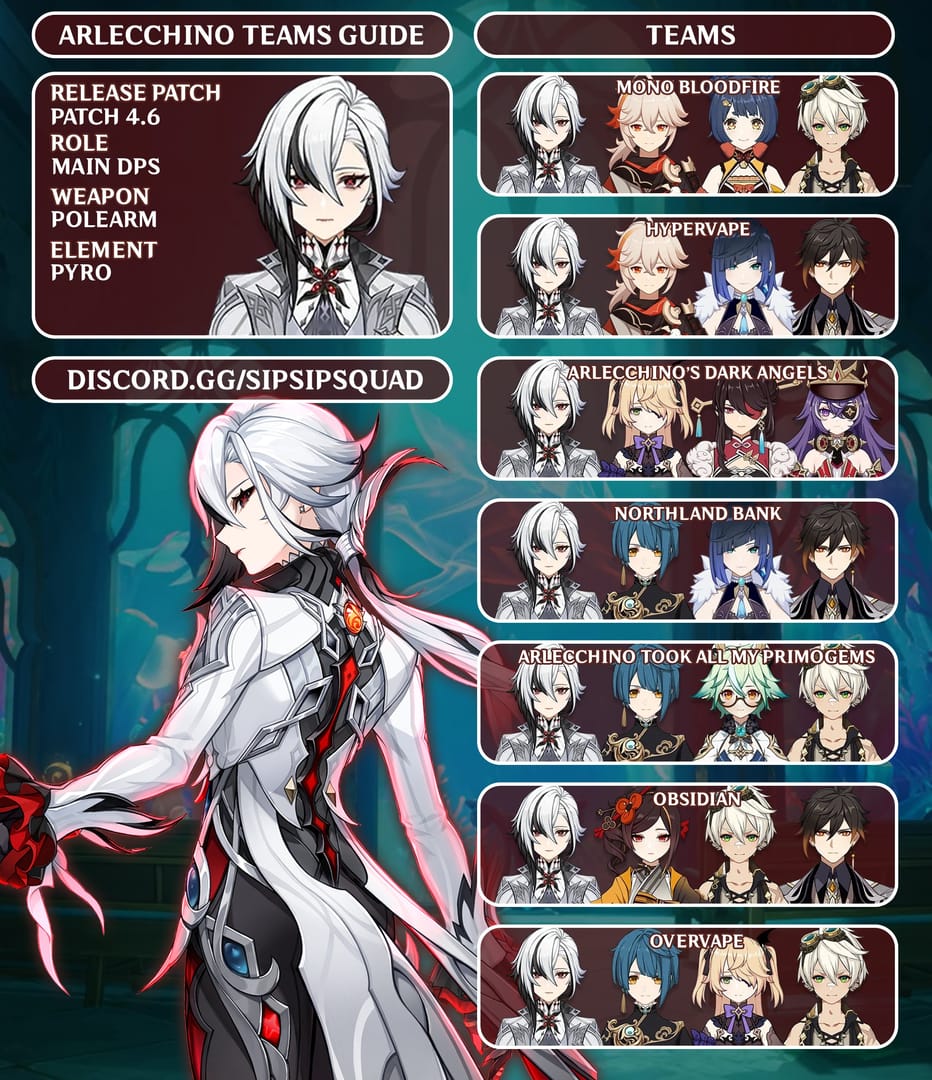
Arlecchino in Vaporize (★★★★★ rating): Pair her as DPS with Yelan or Xingqiu (Hydro sub-DPS), Bennett (buffer king), and Zhongli (shielder/RES shredder). That 2x Vaporize on Normals? 1.2M+ per rotation. Sample rotation: 1. Her Skill for Directive. 2. Yelan's Burst for Hydro app. 3. Bennett's Skill and Burst. 4. Zhongli's Hold Skill. 5. Charged Attack to build Bond and Pyro. 6. 3-6 Normals (pause 2.5s to reapply). 7. Burst if HP's dipping – boom, 800k+ in a 20s cycle. For Melt, swap Yelan for Citlali or Rosaria. F2P version: Xingqiu + Bennett + Zhongli. Simple, effective.
Zhongli's Spot in Top Comps
Zhongli in Mono Geo (★★★★): As support with Itto (DPS beast), Chiori (sub-DPS), and Gorou (buffer). Geo Resonance nets +15% shielded DMG, -40% RES for 20-30% quicker clears. Rotation flow: 1. Hold Skill for shield and shred. 2. Gorou's Burst and Skill. 3. Chiori's Burst. 4. Itto Burst and Skill to stack. 5. Itto's Charged Attacks. 6. Zhongli Burst for petrify – keep 20s shield overlap at 30k HP. In hypercarry setups, shield up front for Neuvillette or Furina; position the Stele for resonance, and he tanks 2-3 elites on Abyss Floor 12 no sweat.
When They Click Together
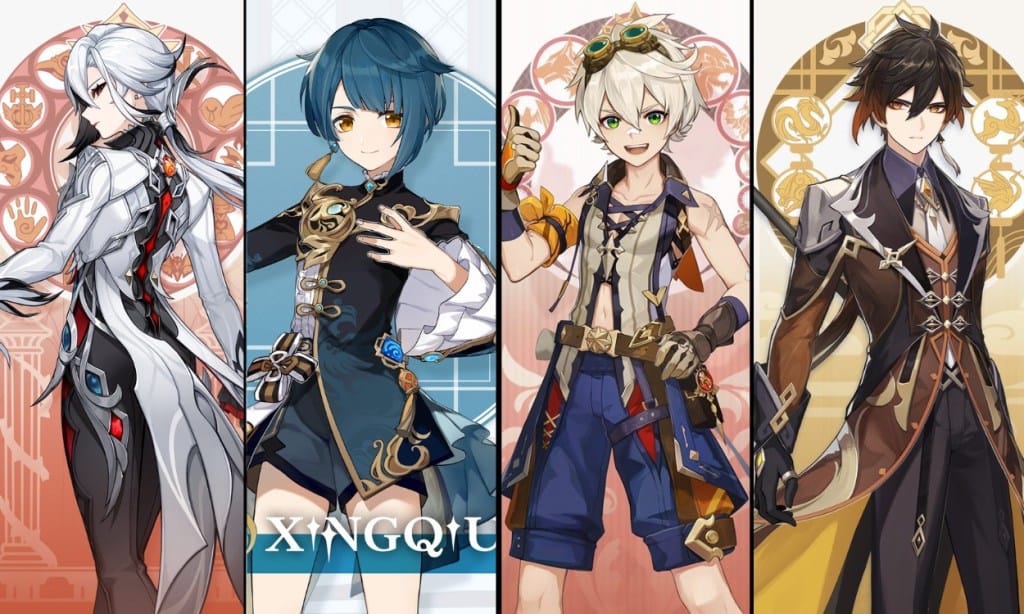
Arlecchino + Zhongli? Magic. His shield nullifies her no-heal Bond risk, and RES shred cranks Vaporize from 1.5x Pyro to 1.8M team DPS. Together, they blitz Floor 12 in 1-2 rotations (30% faster). Shared 4-stars like Rosaria (Melt Cryo), Yun Jin (Normal buffs), and Lan Yan (VV shred) make it seamless. F2P dream: Arlecchino + Xingqiu + Bennett + Zhongli, with her Burst handling self-heals.
Right in the heart of tweaking these synergies during trials, extra resources can make all the difference. Buffget steps up with Genshin Impact top up deals – affordable picks, speedy credits, secure vibes, full game support, stellar customer service, and rave usability ratings from global players.
Their Place in the 2025 Meta
Crushing Abyss: The Numbers
In Version 6.1, Arlecchino's SS-tier frontloaded DPS hits 1.5M+ in Vaporize against stuff like Lunar-Bloom – but she's S-tier without a shielder. Zhongli's SS support shreds through +120% boss RES. She needs 70-80% CRIT Rate for those 500% combo ATK bursts; he hits 30k HP for 6.5k+ absorption, petrifying Frostnight Herra's Gloomveiled attacks. Team gets +20% DPS from his shred. Vaporize squads clear Floor 12 with 1.2M rotations; Mono Geo? 20% faster without reactions.
Holding Up in Endgame
Arlecchino dominates Natlan Melt/Overload against Frostnight; Zhongli's universal for hypercarries, petrifying bosses to dodge 50 DMG hits. Combo them for Abyss and Natlan supremacy. Give Arlecchino 120% ER for Burst uptime; 140% ER plus C1/shield fixes interruptions. (Pro tip from the edit desk: Genshin Optimizer's a lifesaver for nailing 100% buff rotations.)
Building a Future-Proof Roster
Arlecchino's your post-6.1 meta pick (reruns cycled April 2024, January 2025); Zhongli's timeless with 5+ reruns under his belt. Skip if you've got Mavuika or Hu Tao for Pyro, or Diona/Layla for shields – especially with Version 6.2's Durin looming. Stash 20k Primogems pre-rerun for Liyue/Fontaine story beats.
The Good, the Bad, and the Verdict
Arlecchino: Hits and Misses
- Pros: That 120%+ Bond boost, Vaporize/Melt nukes (1.5M+ output), Charged dash for mobility; straight SS-tier in 2025's frontloaded meta.
- Cons: Blocks heals (Zhongli to the rescue), demands heavy investment (2,000+ ATK, 160% CRIT DMG), interruptions sans C1; she dips against Hu Tao in some spots.
Zhongli: Strengths and Weaknesses
- Pros: 30k HP unbreakable shield, 20% RES shred (+15-20% DPS), 40 Energy Burst with CC; SS-tier sustain for Natlan and Abyss.
- Cons: No C0 healing (C6 adds regen), skimpy particles (Gorou helps), Geo-locked; his personal damage's on the low side.
Head-to-Head: Who Wins?
Arlecchino takes the crown for raw damage (SS DPS over S support); Zhongli's all about that comfort (universal utility vs. her Pyro niche). Pull both for 1.8M DPS synergy – but if offense is your weak spot, Arlecchino; sustain holes? Zhongli. (My take as an editor: In 2025's boss-heavy meta, this duo's a game-changer.)
Your Pull Roadmap
Craving More DPS?
If your roster's light on Pyro like Raiden or Hu Tao, pull Arlecchino. Step 1: Tally pity (126 for featured). Step 2: Budget 20k Primogems from events. Step 3: Gear up Vaporize (Yelan + Bennett). Step 4: Trial her for Bond management (Burst clears up to 145% HP max).
Defense First?
No shielder against Diona-level threats? Zhongli it is. Step 1: Peek at Phase 1 pity. Step 2: Farm 10k+ Primogems (Ruins + dailies). Step 3: Max 30k HP with Tenacity 4pc. Step 4: Run Mono Geo (Gorou + Itto) for -40% RES.
Tailored to Your Roster
- Pyro DPS drought: Arlecchino leads.
- Shielder void: Zhongli jumps the queue.
- Both needs: Pull to one guarantee, then switch (<50 pity? Prime value).
- Got backups: Skip and bank for 6.2.
Alternatives and Smart Tips
F2P Swaps
Hu Tao or Mavuika handle Pyro Vaporize sans Bond risks; Layla or Diona shield up (though weaker than 8,200 absorption). F2P staple: National variant with Zhongli stand-in (Xingqiu + Xiangling + Bennett).
Primogem Grinding Hacks
Ruins Exploration (November 7-24) yields 600 Primogems +4 Fates; Dance Disco (November 17-26) adds 420 + Hero's Wit. That's 1,020+ total, plus Miliastra Wonderland UGC bonuses. Dailies: 60 a pop. Abyss: 600 monthly. Swap Prototype Starglitter for ER sands.
Pitfalls to Dodge
Don't chase consts past C1/C2 (Arlecchino's C1 for QoL, Zhongli's C2 for team shields); bail if 50/50 loss looms without low pity. Arlecchino flexes in non-reaction teams too. Always trial squads before committing.
Wrapping It Up: Pull or Pass?
My Final Call
For 2025's DPS meta, Arlecchino's your star; Zhongli locks in sustain. Both? Vaporize dreams with 30% faster clears. F2P crew: Grind events for 60-80 pulls – it's doable.
Eyes on Future Banners
Version 6.2 brings fresh faces like Durin; Zhongli might loop back early 2026. Scope the Genshin Impact Ultimate Pull Guide for the full calendar.
Dig Deeper with Community Stuff
Hit up the Arlecchino Build Guide and Zhongli Team Comps 2025 for tweaks. Decided? Dive into our banner calendar and start that Primogem farm today!
FAQ
Should I pull Arlecchino if I've got Lyney?
Yeah, if you want beefier Vaporize DPS – her 120%+ Bond outpaces Lyney's charged focus. Skip if your Pyro's already sorted.
Zhongli still meta in 2025 Genshin?
Absolutely, SS-tier RES shred and shields smack down Natlan's +120% RES; he's Abyss Floor 12 essential.
Primogems for Arlecchino's C1?
Around 126 pulls post-guarantee (~20,160 Primogems); C1 bumps Masque DMG by 40% to curb interruptions.
Best teams for Arlecchino?
Vaporize shines: Arlecchino + Yelan + Bennett + Zhongli (1.2M+ rotations). Melt? Rosaria or Citlali sub-in.
Zhongli vs. Furina as support – pull which?
Zhongli for shielding and RES shred (+20% universal DPS); Furina buffs reactions better – but Zhongli wins on defense.
How do Arlecchino and Zhongli synergize?
Like a dream: Shield lets Bond run wild, shred juices Vaporize to 1.8M DPS; they clear 30% faster together.